Shopping list:
Let's get started!
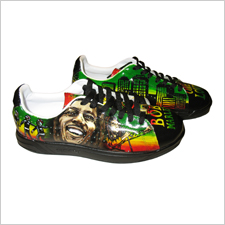
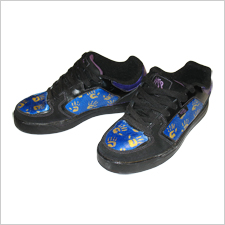
After extensive research we have found the best leather paints to customize your leather shoes, belts, jackets, wallets or whatever you have that's leather. (Works on some vinyl too by the way.) Used by the most professional artists of the industry, this acrylic paint is flexible so it will not crack or peel when applied correctly. This guide will help you understand the basics of what it takes to paint your leather. Along with our helpful hints, we have a very useful Youtube video and a booklet that explains the process in detail along with pictures and project ideas.
The preparation of your leather is as important if not more important than applying your paint correctly. These paints need to be applied directly on leather, not onto the finish that the manufacturer has put on it. Your paint will not work unless you fully take off all the wax finish, as shown in the Youtube video (watching the video is highly recommended). With that said, we hope you enjoy this process as much as we did.
Step 1: Strip off any wax finish from your leather using the Angelus Leather Preparer Deglazer, or Acetone (which can be quite harsh on the leather). Using cotton balls with the Angelus Leather Preparer, rub down the leather surface to remove the wax. Make sure to throw away each cotton ball after using all sides so you're not just smearing the wax around. Q-tips are ideal for reaching into corners. Keep in mind that Acetone and Deglazer tend to evaporate quickly so keep your lid on the bottle. If you don't do this process correctly the paints won't adhere well and will crack, peel, or feel tacky. After this process it's a good idea to clean your leather with the Angelus Easy Cleaner.
Step 2: Now it's time to paint. You can lightly trace your designs in pencil before you start, if you desire. Just remember that this paint is fairly transparent, so a dark outline may show through. Apply a thin, even coat and allow the paint to dry before applying the next coat. You should apply up to three coats, but use your judgment and make sure the paint is not too thick. The thicker the paint the more likely it will crack. If you make a mistake when painting, the Angelus Deglazer works very well as an eraser for the paint. You can mix colors to get the shade you desire. We also found that this acrylic paint dries faster than other acrylics, so keep the caps on your paints and store in a cool location. Let the paints air dry before going on to the next step.
Step 3: Apply a finish to the paint. We have 4 kinds of Angelus Finish to choose from: Matte, Satin, High-gloss and Flat Top. The Flat Top has no shine to it, Matte finish has very little to no shine, Satin finish lends a slight gloss or shine, and the High-gloss finish leaves a very shiny look. Apply 1-3 coats of your chosen finish with a paintbrush or cloth and let dry between each coat. We recommend letting your painted and finished leather cure over night, before you go out and rock it.
Step 4: Rock your painted leather.


